

No, not all ice is created equal. Here’s how to make crystal-clear ice to elevate your cocktails at home.
If there’s one thing that separates us home bartenders from the pros, it has to be the ice. You know what I’m talking about. You pull up a seat at the bar, order a Negroni or an Old Fashioned, or some new creation, and at the centre of your cocktail is a nearly transparent cube of ice. These blocks are like shimmering air; barely there but somehow keeping your cocktail cold.
Clear ice is a very cool visual touch and actually melts slower than regular ice. For a few reasons, though, it’s not something you can get out of your standard trays, meaning it’s generally the domain of high-end cocktail bars. The good news is that you can absolutely make clear ice at home, and it’s a great way to impress guests and take your cocktail game up to the big leagues. Let’s check it out.

We drink with our eyes (as anyone who’s ever side-eyed an over-the-top Bloody Mary will attest) and that’s a big part of clear ice’s appeal. But, while clear ice makes every cocktail look at least a hundred times cooler (according to science), the other big benefit is that it melts slower than regular ice.
See, dilution in a cocktail is important – that’s one reason for shaking or stirring with ice. The little bit of water that enters the mix in the process can soften the alcoholic components, marry ingredients, enhance flavours and lengthen the drink ever so slightly. So, when we then add that drink to a big old cube of ice that begins to melt, our cocktail ratios get out of whack.
That’s the big (non-visual) benefit of clear ice – it keeps the drink cool, as ice should, but without adding extra dilution. It’s not business-critical to your cocktail (so please don’t start making sad faces at your silicon ice cube tray, it’s totally fine), but it does add a certain level of quality that will impress your friends and taste buds.
Ready for the inside word on how clear ice is made? You’ll need to use something called ‘directional freezing’, which is not how water naturally freezes in your home. Usually, water freezes from the outside in or, otherwise, in a bunch of directions at once. Directional freezing forces the water to freeze in a single direction, pushing all those impurities and air bubbles away.
Ideally, you also want the ice to freeze really slowly, as that leaves time for the air to escape, rather than get trapped. Starting with water that’s been stripped of its impurities is a big help, too.
So, to recap, to make clear ice, you want to freeze water (ideally, very pure water) very slowly in one direction. Shall we see if we can make that happen at home?
Spoiler: you can definitely make clear ice at home. It might not come out as the 140kg blocks that eventually end up in your drink at bars like Melbourne‘s Heartbreaker, but it’s still going to look the part and melt slowly. That’s a double tick for us.
There are a few ways that home mixologists make clear ice from the comfort of their own homes. There are endless at-home kits and trays of varying quality and effectiveness (have a quick Google and you’ll see what we mean), but one method you might have seen doing the rounds involves an esky.
Essentially, you fill your esky with water and it’ll slowly freeze. This method definitely gets you a big block of clear ice, though it’s not 100% clear – you have to carve away the big section that retains all the air and impurities, which is easier said than done for most of us. Have you ever tried carving ice at home? It’s a whole thing. Definitely try this method if you have the freezer space and inclination but, for us, there’s one other way that we prefer.
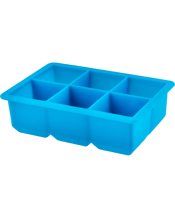
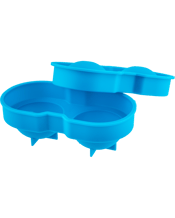
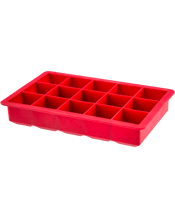
Here’s a technique we’ve adapted from the legends at the Food Network. It works well and uses gear you’ve probably already got at home (i.e. a silicon ice cube mould). One big tip before you begin, though: the purer the water, the better the results. This means using highly filtered or distilled water if you can swing it. If not, don’t worry, it’ll still work, but it may not be 100% clear.
1. Boil water
Whether you’ve got purified water or not (and, as we said, it really helps if you do), boiling your water before freezing is going to help a lot. Dissolved particles like oxygen will evaporate during the boiling, removing plenty of those impurities and air bubbles.
2. Freeze that hot water
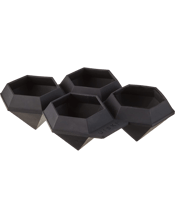
Pour your hot (not boiling) water into your ice cube tray. Silicon moulds are best because they’re insulating, but use what you have. The hot water is important here, because it’ll freeze slower, which is one of the key parts of making clear ice. Transfer to the freezer for 24 hours, after which you should have clean, clear ice cubes ready for your cocktails.
3. Store in an airtight container
You know when you open a tub of ice cream and the top is covered in tiny ice crystals? Yeah, you don’t want that with your clear ice. Store them in an airtight container or freezer bag and you’ll be ready to go. Now the only question is: what to make? Maybe check out our massive cocktail library for some inspo.


%20(1)?$dans-daily-web-image$&hei=900)
?$dans-daily-web-image$&fmt=png-alpha&wid=800)