


Members get FREE Delivery on metro orders $149+ (T&Cs apply*)
-1?$dans-daily-web-image$&wid=1400)
This clarifying cocktails is just for the experts? Give it a go on the beloved Piña Colada.
About the cocktail
If you’re scratching your head, wondering what in the hell a Clarified Piña Colada could possibly be, don't stress – let us explain what it’s all about. First of all, clarifying, while extremely cool, isn't a new phenomenon. Chefs have been doing it for yonks – clarifying stocks with egg whites or small bits of meat. In terms of drinkable liquids, cocktail guru Dave Wondrich points out that bartenders have been clarifying drinks since the early 18th century. In his book Punch, he explains that to soften the acidic effect most fruit punches had on the stomach, milk would be added. As you can imagine, that would leave a curdled mess. So, what bartenders would do back in the 18th century is strain the liquid through a cheesecloth, removing the solids ’til the liquid poured almost completely clear. Eventually, it would leave them with a fruit punch that is, yes, fruity, but also textural and creamy – sans cream. Cool, huh? But why? Well firstly, it looks great. It’s like when Coca-Cola went clear. Secondly, it's a mind-melter – you’re drinking something essentially see-through that tastes like it should be a chunky, frothy, creamy Piña Colada. Lastly, milk-washing in particular gives a cocktail an amazing texture and mouthfeel. Silky and smooth like cream, without the actual cream. It’s like a magic trick. What does this mean for a tropical drink like a Piña Colada? Well, as you may know, a classic Piña Colada is a chunky drink. It’s coconut, cream and pineapple blitzed with ice and garnished with cherries and a few pineapple fronds (sometimes a cheeky umbrella). We love it, but it’s always a lot, right? It screams ‘I bought the all-inclusive resort package’ rather than sophisticated elegance. What clarifying does for this drink is rebuild the flavour profile to make it slightly lighter and rounder and, of course, clear. So, those lime, coconut, rum and pineapple flavours are all there just muted slightly and rounded out with the clarifying. Instead of an icy slush, you get a silky smooth sipper. For bonus points, we’ve also added orgeat to our recipe, which lends the whole concoction a delightful hint of marzipan. If you want to take your home bartending to the next level, have a go at clarification. It’s definitely advanced, but with the tips below (and a good serve of patience) we know you’ve got this.


Ingredients
270mL whole cream milk
480mL aged rum 270mL coconut water 135mL orgeat syrup (recommended, but if omitting use 120mL of muscovado sugar syrup instead of 30mL)
270mL pineapple juice 30mL muscovado sugar syrup (to make your own, use a 1:1 ratio of muscovado or brown sugar to water with the method below) 90mL fresh lime juice Garnish: orange slice, maraschino cherry and mint sprigs, or fresh pineapple and lime
Method: Muscovado sugar syrup
1. In a heat-safe jug, add equal weights of hot water and muscovado sugar (or sub with brown sugar in a pinch) and stir until sugar is dissolved
2. Allow to cool and pour into a clean, airtight container – your syrup will keep in the fridge for up to a month
Method: To clarify the cocktail
1. Get two jugs – add your milk to jug one and all your other ingredients (except the garnish) to jug two
2. Slowly pour jug two (the one with your rum, pineapple juice and other ingredients) into jug one (the milk). It is super important to pour the mixed ingredients into the milk and not the other way around (we've explained why in the tips section below) 3. Stir gently until the mixture begins to split, then let sit for 15 minutes. You're waiting for the solids (AKA the curds) to separate 4. While you’re waiting, place a large sieve or colander over a bowl, and line the sieve with a clean tea towel, Chux or cheesecloth (you can also use a coffee filter, but as it’s smaller it’ll take longer).
5. When the 15 minutes is up, very slowly and carefully pour the mixture (curds and all) into your lined sieve – liquid will start to strain through to the bowl beneath. It won’t run clear at first, but as the curds settle into the cloth, they’ll form an extra barrier for the liquid to filter through. After a while, the liquid will start to run clear and you’ll know that it’s working. Depending on the size of your cloth/sieve/bowl set-up, you may need to do this bit by bit, pouring a small amount of liquid in at a time. Just remember, that curdy barrier is crucial to the process, so as you pour, be gentle and try not to disturb the solids lining the cloth 6. It’s time for a repeat – once all the liquid has passed through the sieve, pour the strained liquid back into the jug, replace the bowl under the sieve, and pour the liquid through the cloth/sieve a second time. Remember, we need those solids in place to help with the straining, so don’t go tossing them out, and be careful not to disturb them as you pour 7. By this point, your strained liquid should be clear and looking like a classic juice box apple juice (not the cloudy kind, obviously) – et voila! That’s your Clarified Piña Colada. If there’s still some cloudiness, you can run it through a third time for even more filtering – but that’s probably overkill.
Method: To serve
1. Fill a tumbler glass with ice and pour over the desired amount of your clarified cocktails
2. Garnish with a slice of orange, a maraschino cherry and some fresh mint sprigs, or fresh pineapple and lime
Dan’s top tips
The clarified cocktail takes some time to perfect, but when you get the hang of it, it adds such a unique textural element to your drinks. Before you start straining and curdling, there are a few things to keep in mind – number one being to follow the recipe carefully. This is a complex drink, so until you reach pro level 10,000, stick exactly to the measurements and method we’ve outlined to get the best results. That includes always using fresh whole-cream milk. Anything that is thinned out or uses a thickening agent will not work, so don’t skimp here. It can help to understand the science behind what you’re actually doing here. By adding acid to the milk we make it curdle, separating into solids and liquids – also known as curds and whey (it’s all very Little Miss Muffet). The reason we can use this method to clarify our drinks is because milk contains proteins that bind to certain molecules – particularly polyphenols, responsible for bitter and astringent flavours. Then, through the filtering process, we’re blocking solid particles and allowing the clear liquid to pass through. But while you’re removing certain elements, you’re also adding something important to the clear liquid – whey proteins. That’s what gives milk-clarified cocktails their signature creamy texture (without the creamy visual). Now that you understand a bit of the science, it’s important to remind you to pour the jug with the mixture of ingredients (the one containing your acid – in this case, pineapple juice) into the milk, and not the other way around. This is critical to the splitting process, so pay attention! And go slow. What you’re doing is lowering the pH of the milk, which kicks off the curdling. By pouring the acid into the milk, we’re lowering that pH gradually. Flipping the order would mean a sudden pH drop, curdling the milk immediately, before it’s had the opportunity to mingle with your spirit and bind with the polyphenols. When it comes to this Clarified Piña Colada recipe, if you want to simplify things slightly, you can omit the orgeat syrup and just up your sugar syrup (we’ve included instructions in the recipe just in case). You could also swap out muscovado for regular old brown sugar in your syrup recipe if that’s easier for you – just note it will alter the texture and flavour a little. We offer a word of advice, though – if you’re going to the effort to make a complicated recipe like this one, it’s best to go the whole hog. Clarifying a drink strips away some of the flavour in the process, so you want to start with a really flavoursome mix. That way, even as the drink becomes lighter and rounder, you’re still left with something truly tasty in the glass. There are no real shortcuts with this recipe, everything has to be done very carefully, especially during the mixing and straining process. But it’s an awesome science project that’ll leave you with a cocktail at the end. So go slowly, be patient, and reap the delicious rewards.
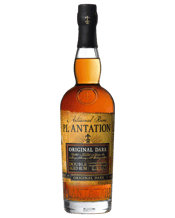
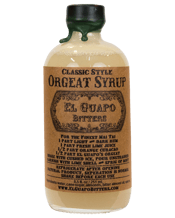
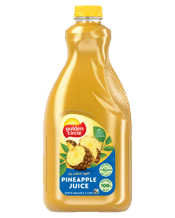
image credits: Shelley Horan (photography), Bridget Wald (styling).


